VexGO
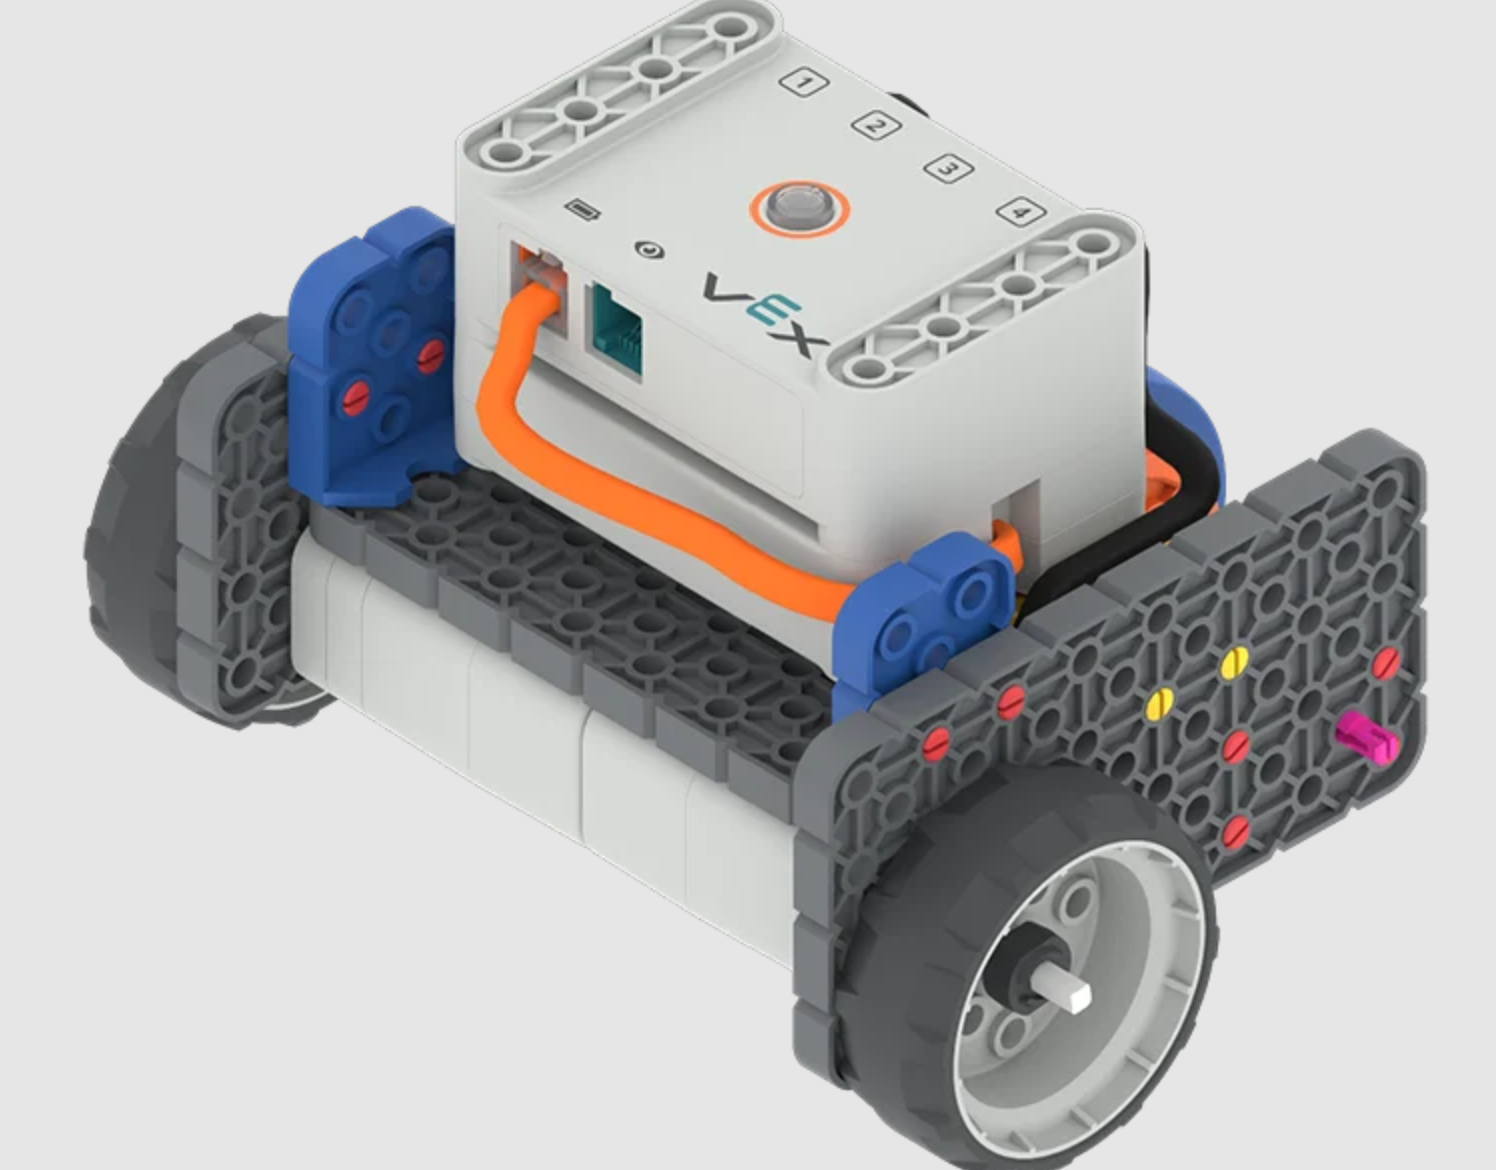
Vex Go is an easy plug and play robot with motors, sensors, and LEDs
It uses the VexCode programming environment , here is the link to VexCode
The VexGo robots uses the VexCode Go program which is a block coding environment.
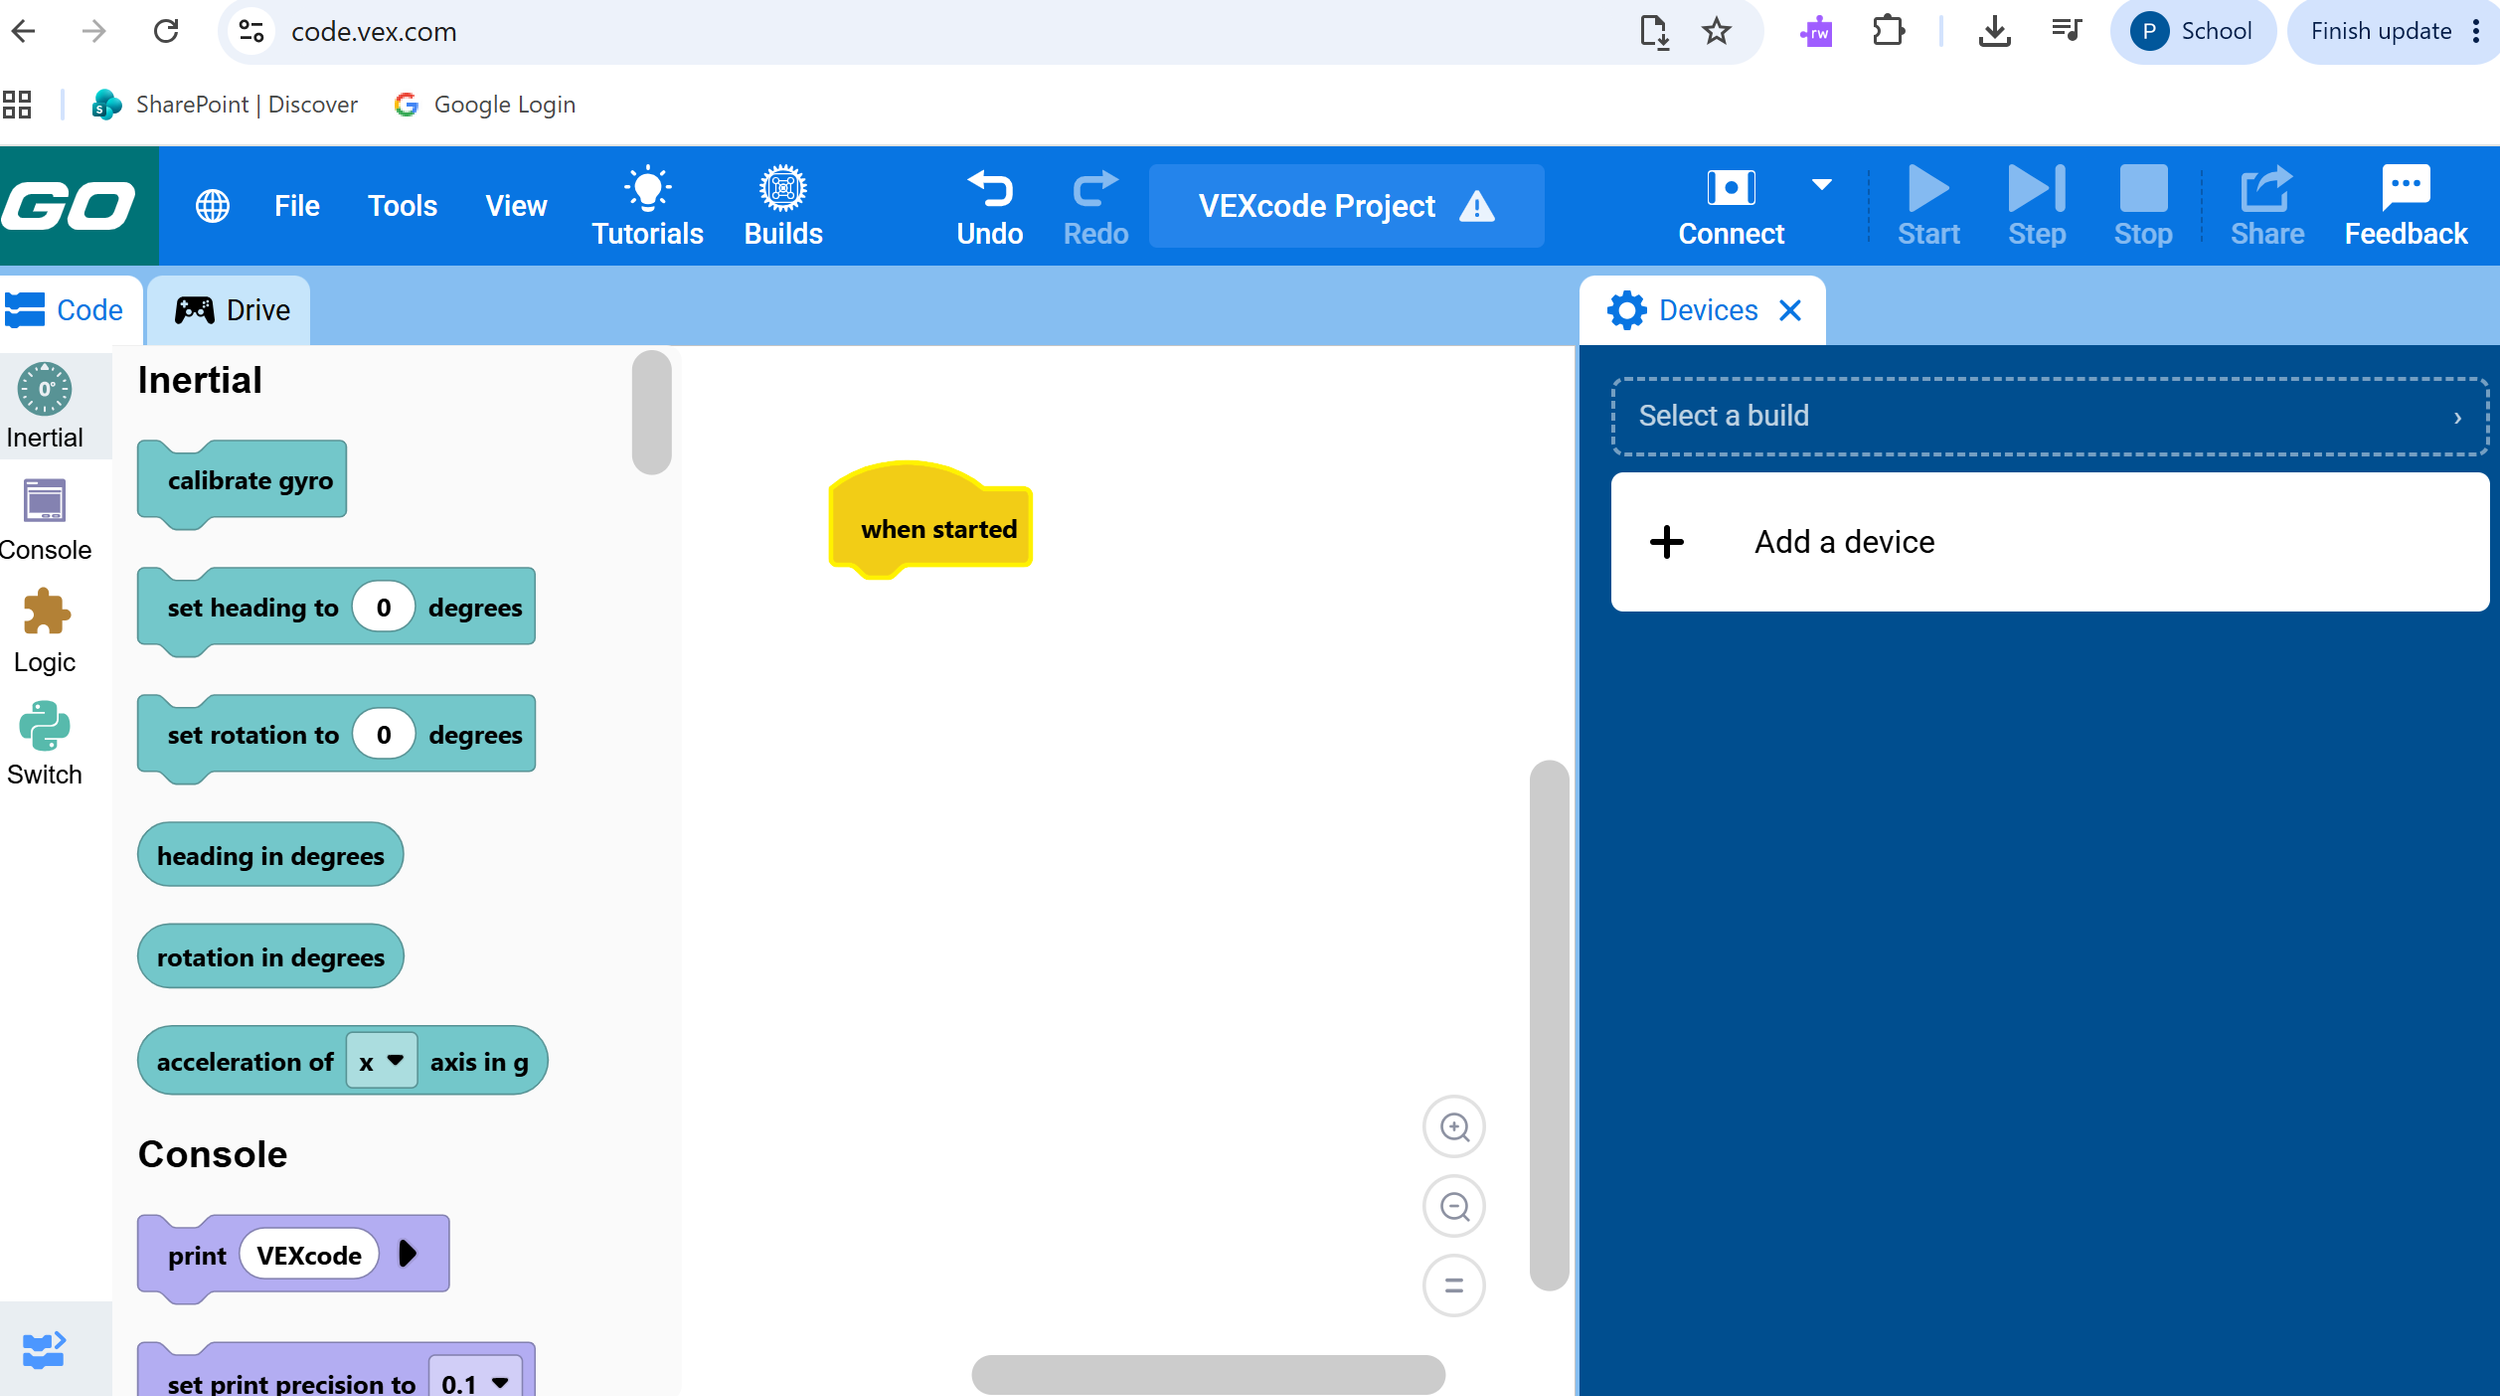
The code blocks are found on a scrolling menu on the left, while the programming and adding device section can be found on the right of the screen
VexGo include many different pieces and parts. The ‘Vex brain’ contains all of the ports to plug different Vex pieces in
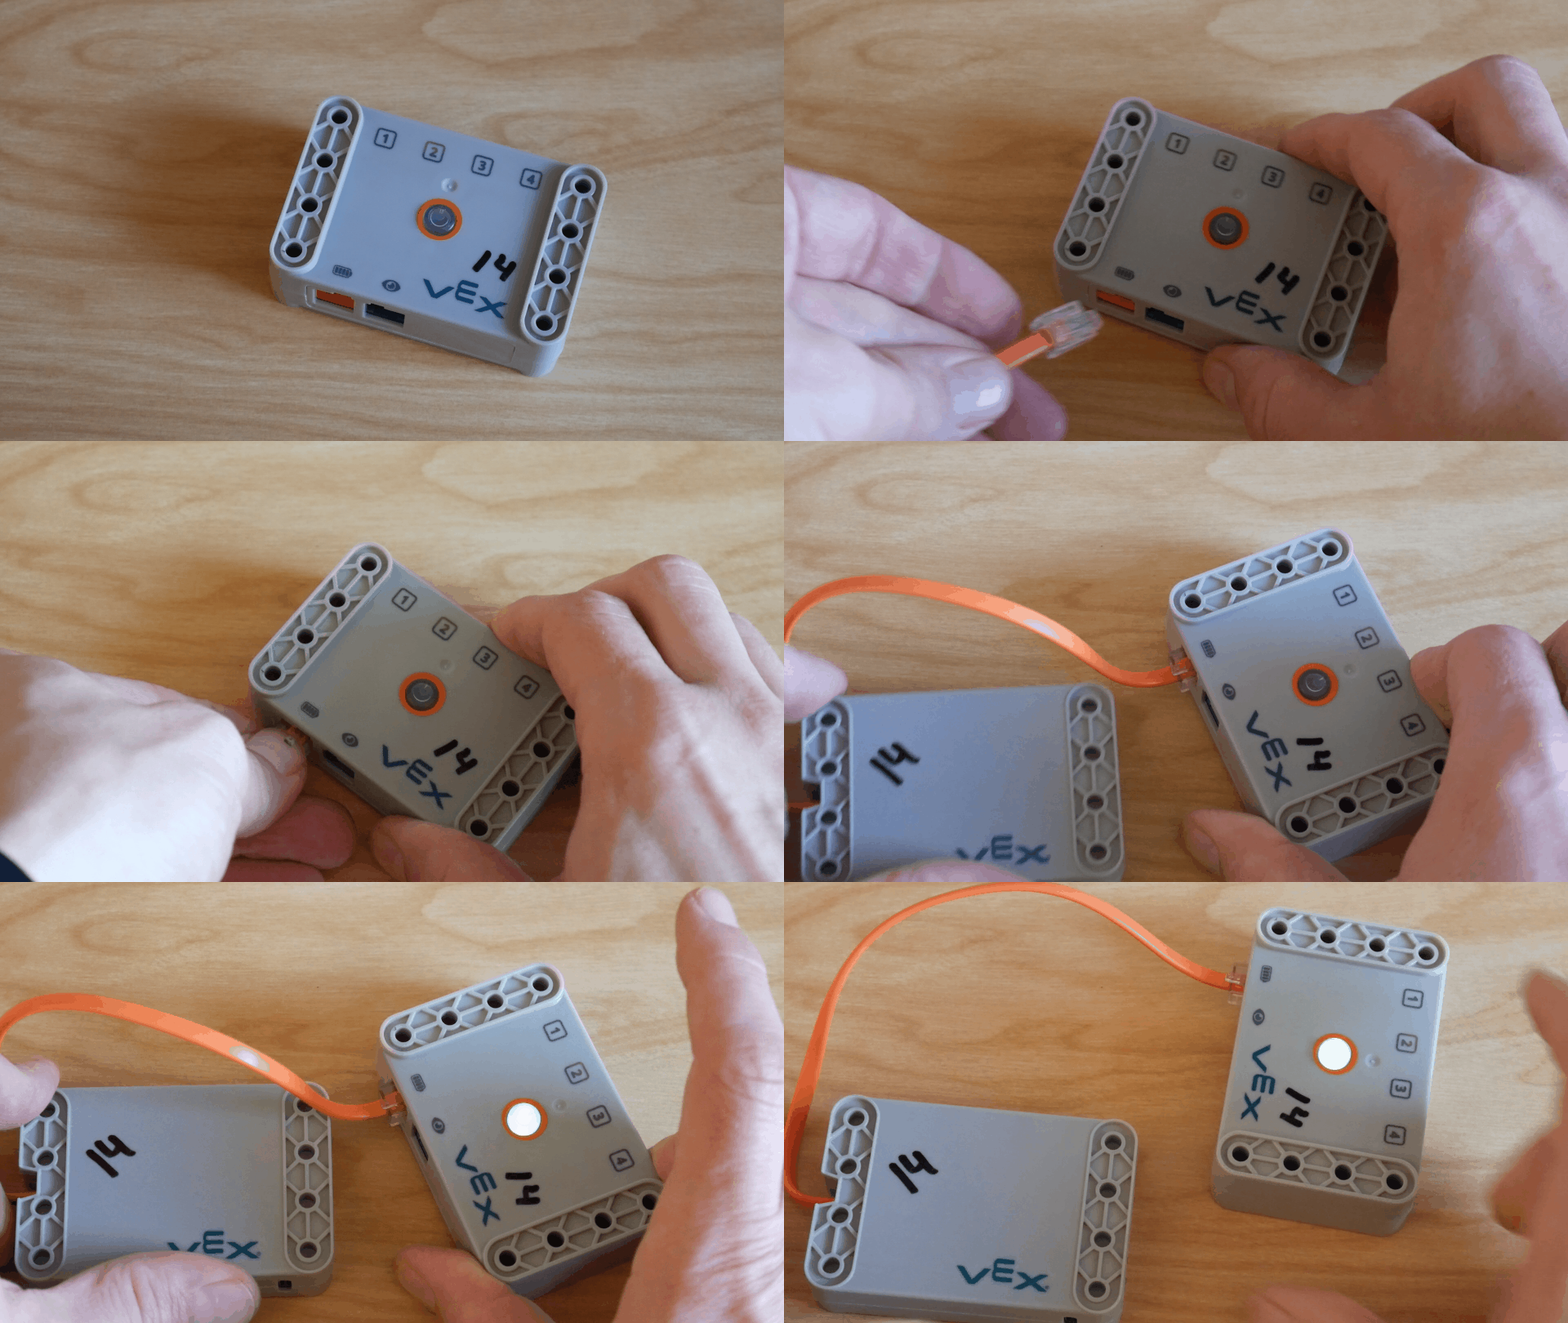
Let’s start by plugging the power source into the Vex brain. The power source will have a orange cord, plug it into the orange port on the Vex brain.
Start the Vex brain by pressing down on the button in the middle — it should turn green
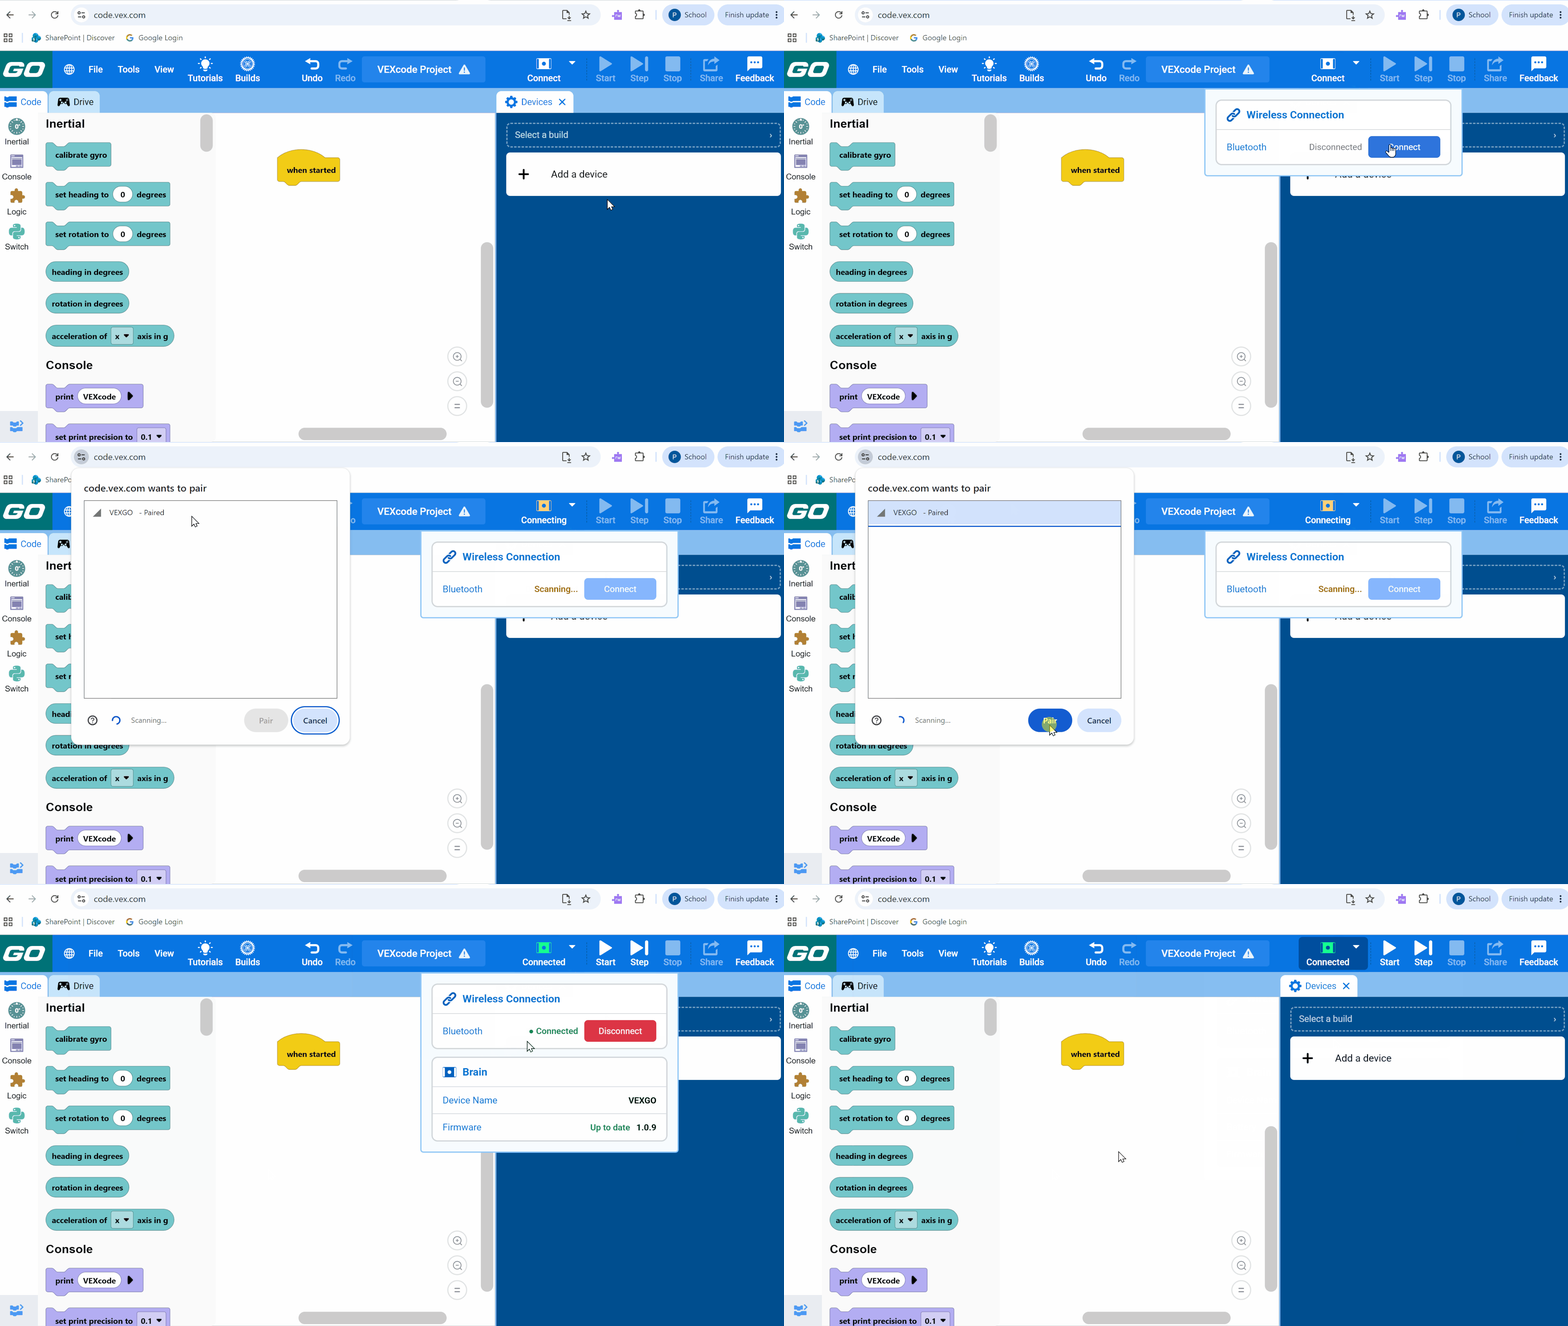
In the VexGo coding environment press connect
A screen will pop up with options to connect — select to VEXGO
It may take a minute to connect, if connected properly, the icon will appear green
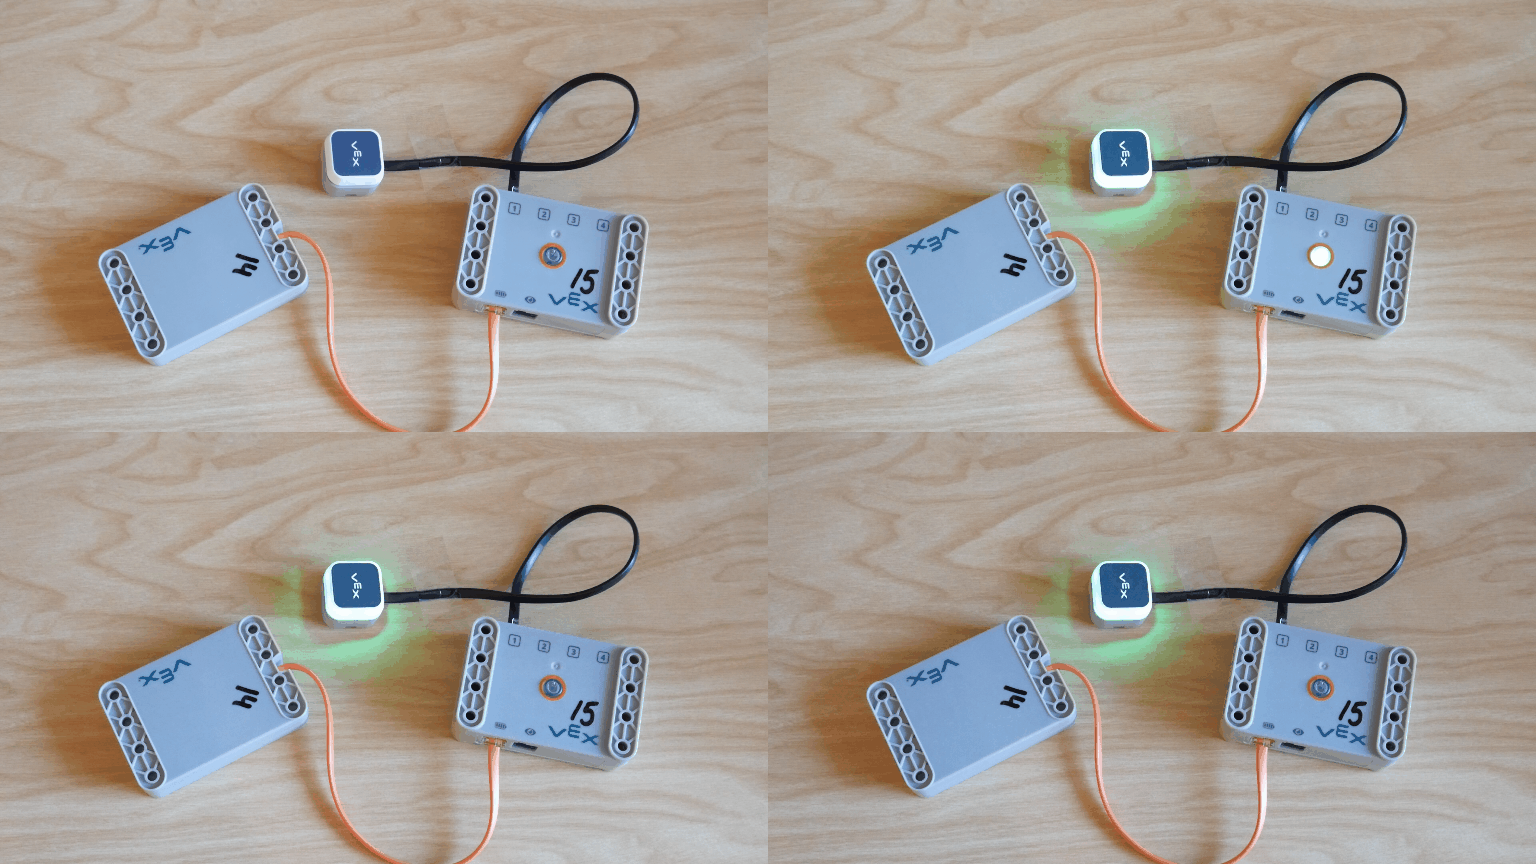
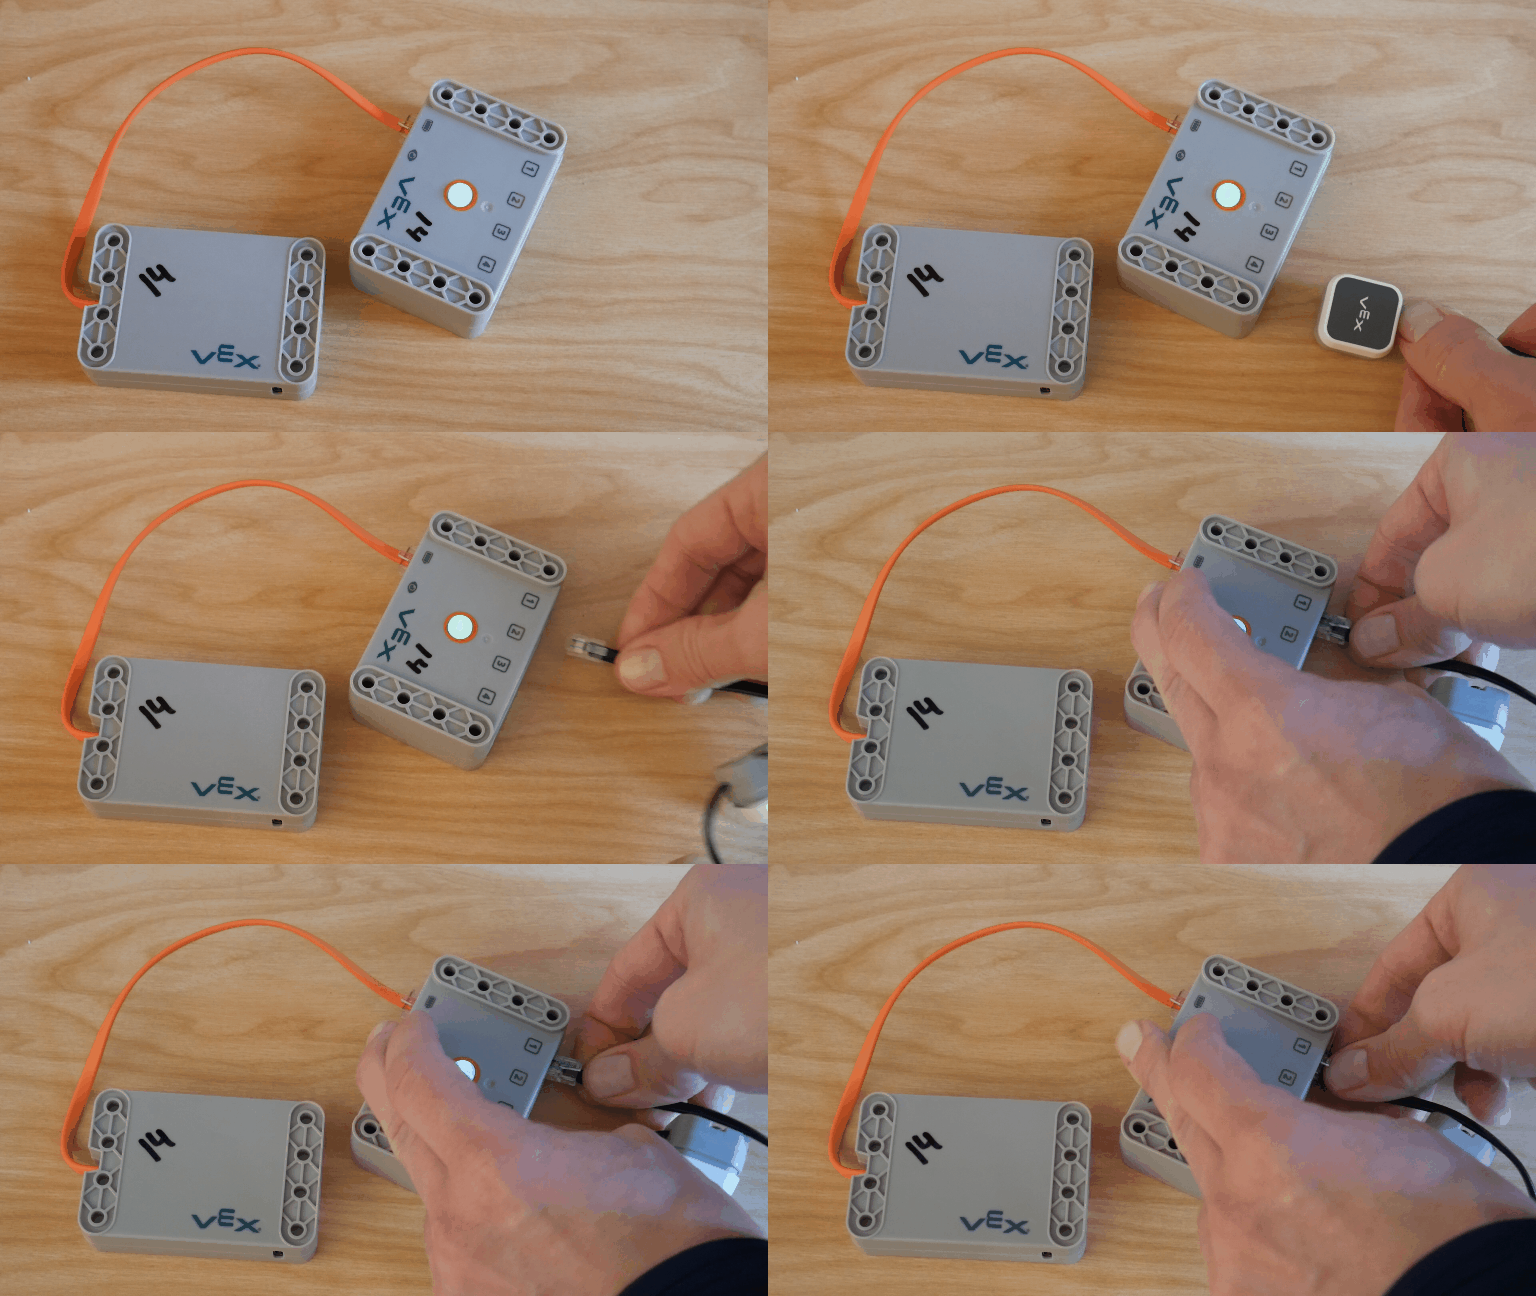
Plug the touch LED into Port 1 on the Vex brain
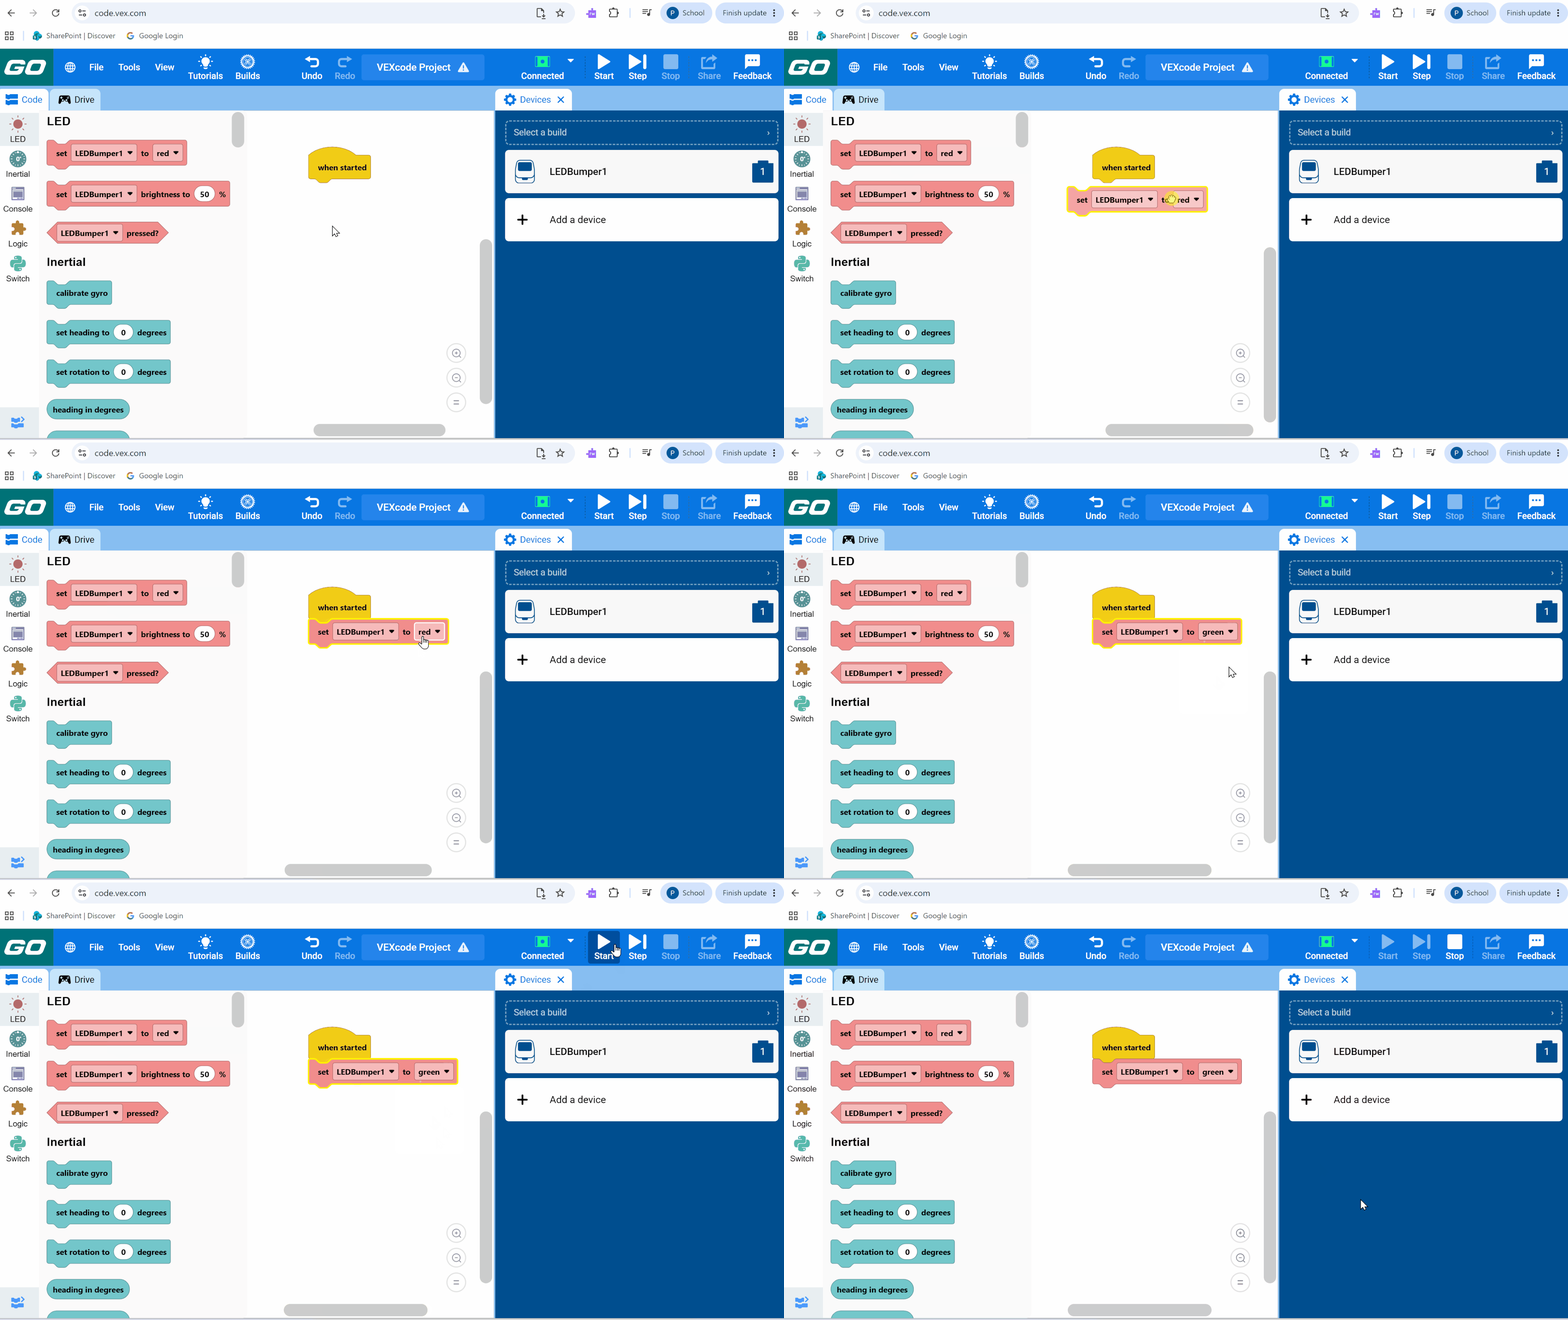
In the VexCode environment drag the ‘set’ block underneath ‘when started’
Make sure the proper LED Bumper is selected (LEDBumper 1)
Toggle the LED to color green
Then press the play button
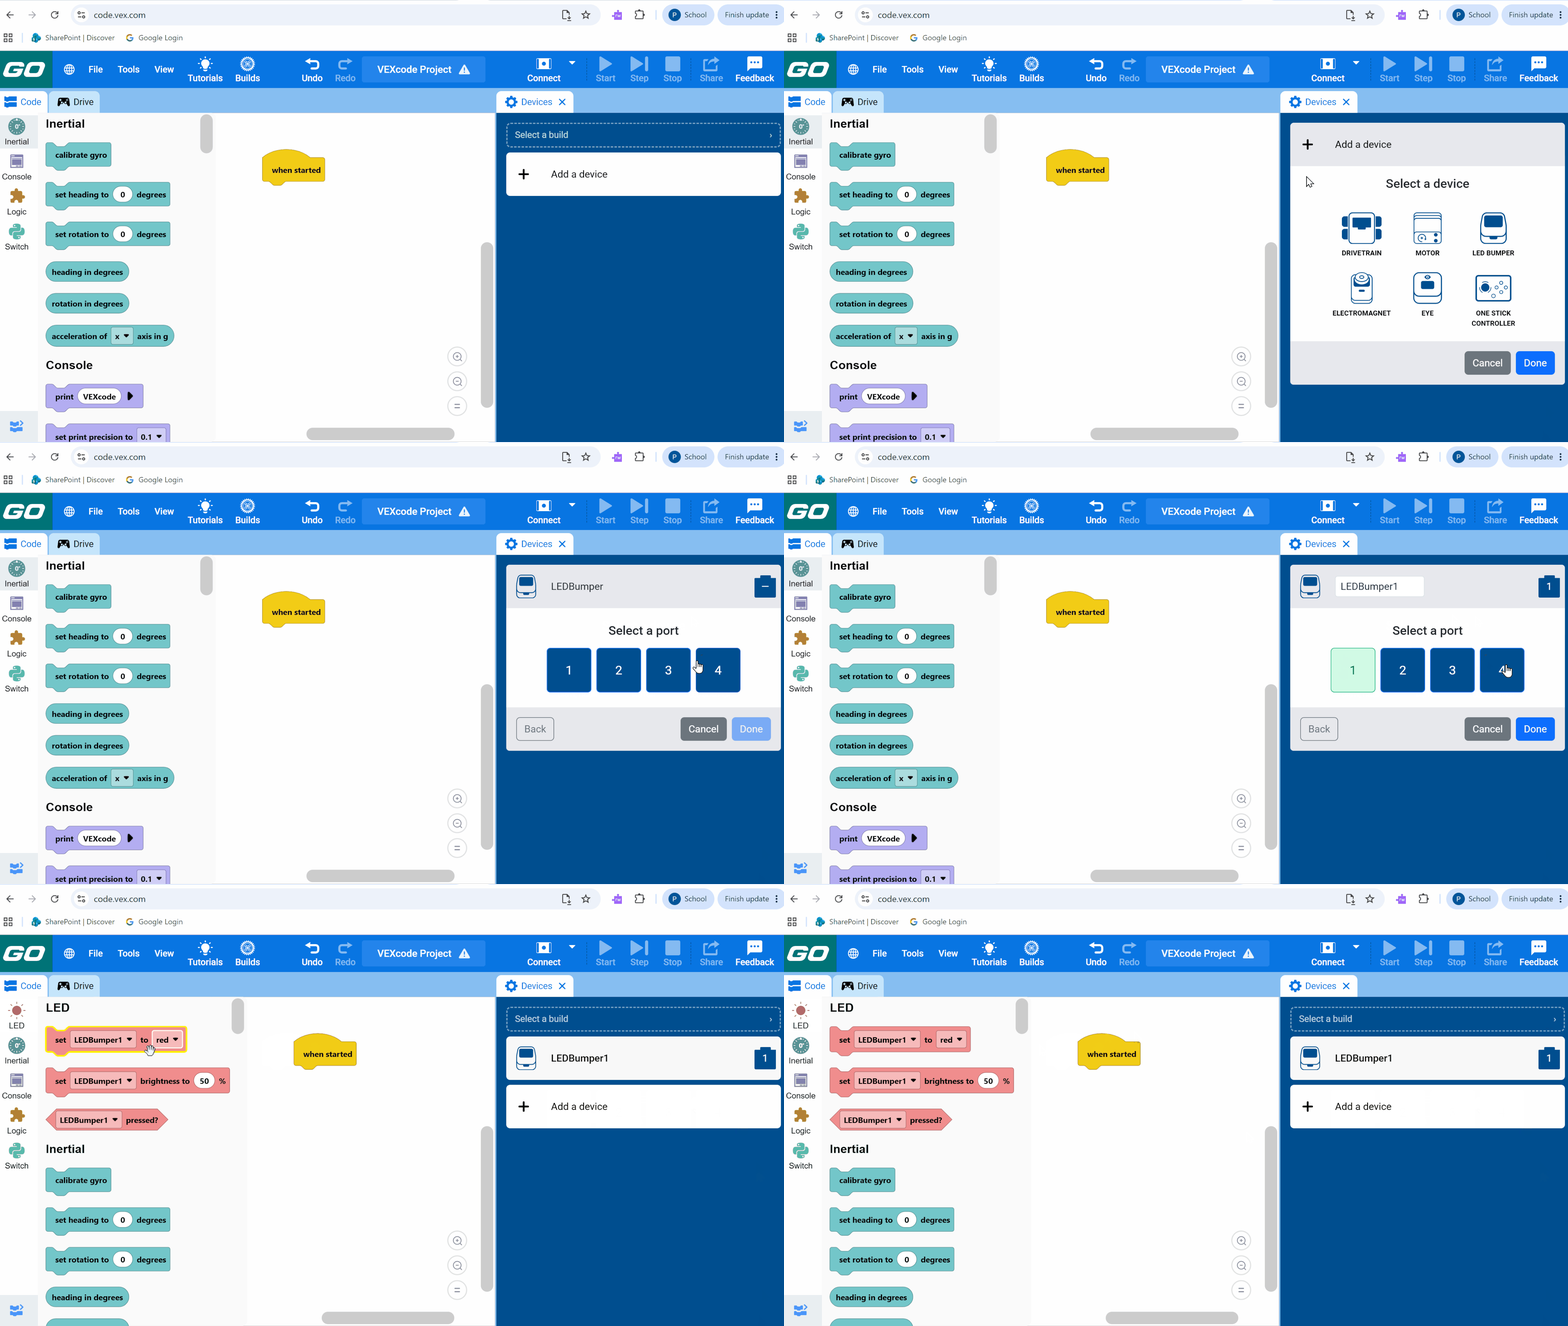
Go to the VexCode environment and select ‘Add a device’
Select LED Bumper from the menu and select port number 1
New block code options will appear now appear on the left hand side of the coding environment
In the VexCode environment drag the ‘set’ block underneath ‘when started’
Make sure the proper LED Bumper is selected (LEDBumper 1)
Toggle the LED to color green
Then press the play button and watch your LED bumper turn green!