
MakeCode & MicroBit
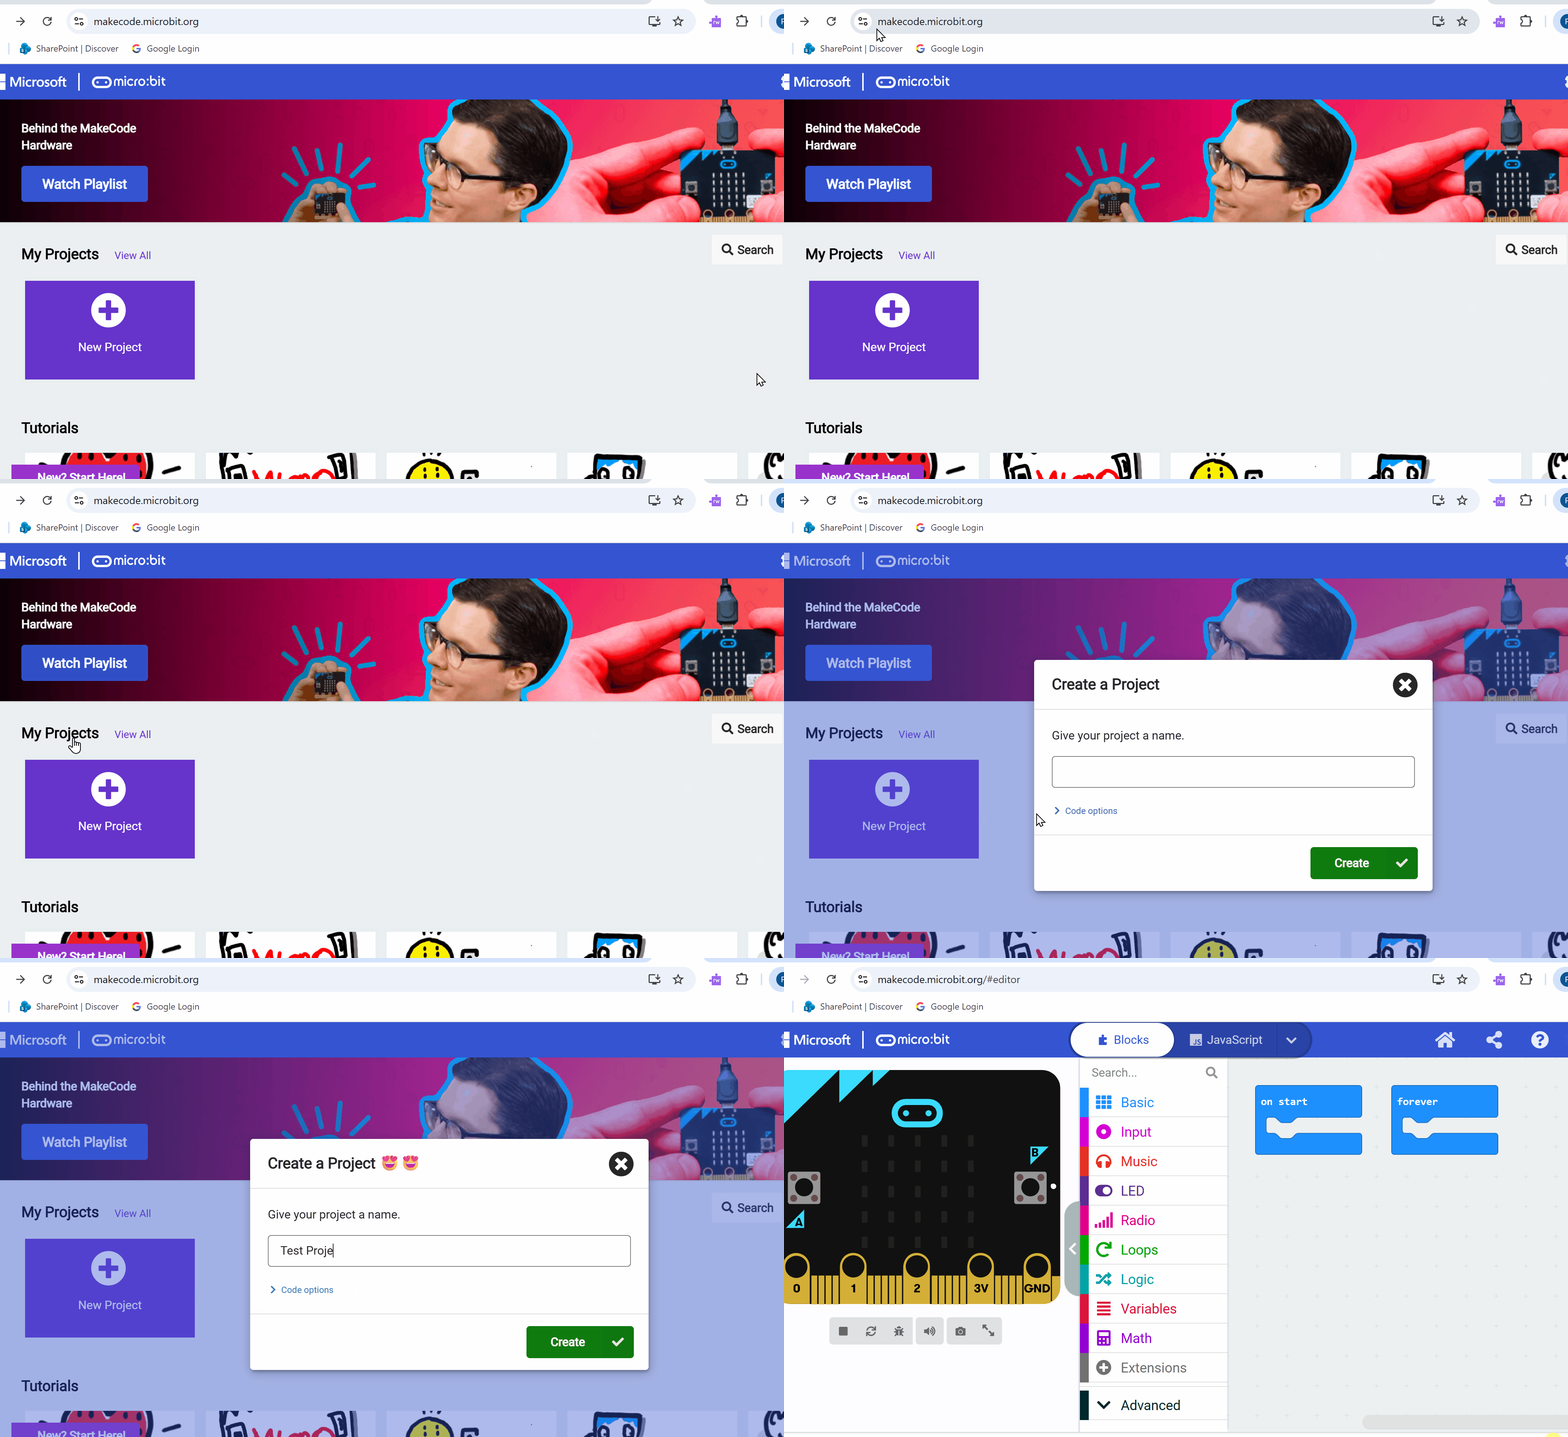
Let’s try MakeCode! Click Here to get to Makecode
To create a new project click the section labelled ‘New Project’ — a coding environment will pop up
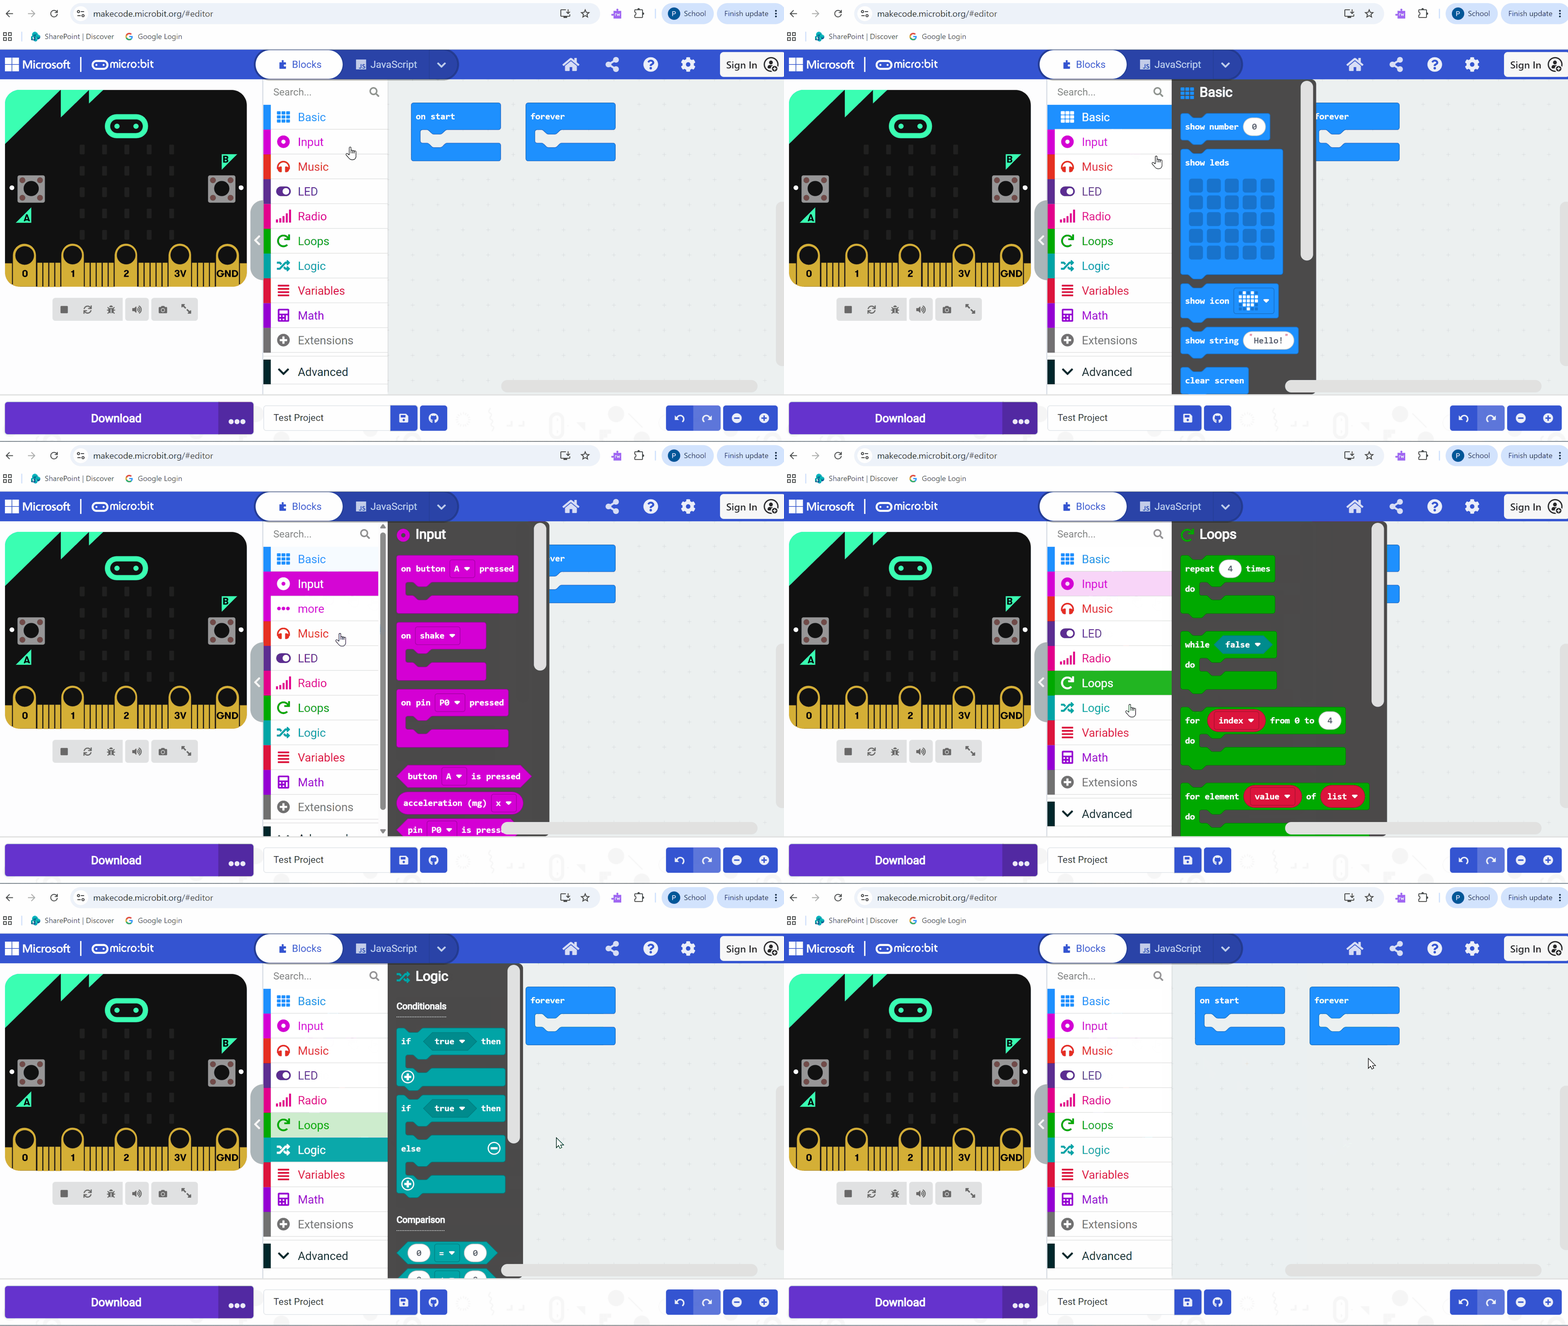
MakeCode is a online programing environment that uses block coding to drag and drop directions
The coding environment shows the various directions that can be used to program, as well as a robot which in this case is called a MicroBit
Let’s play with the Virtual MicroBit before trying the real deal!
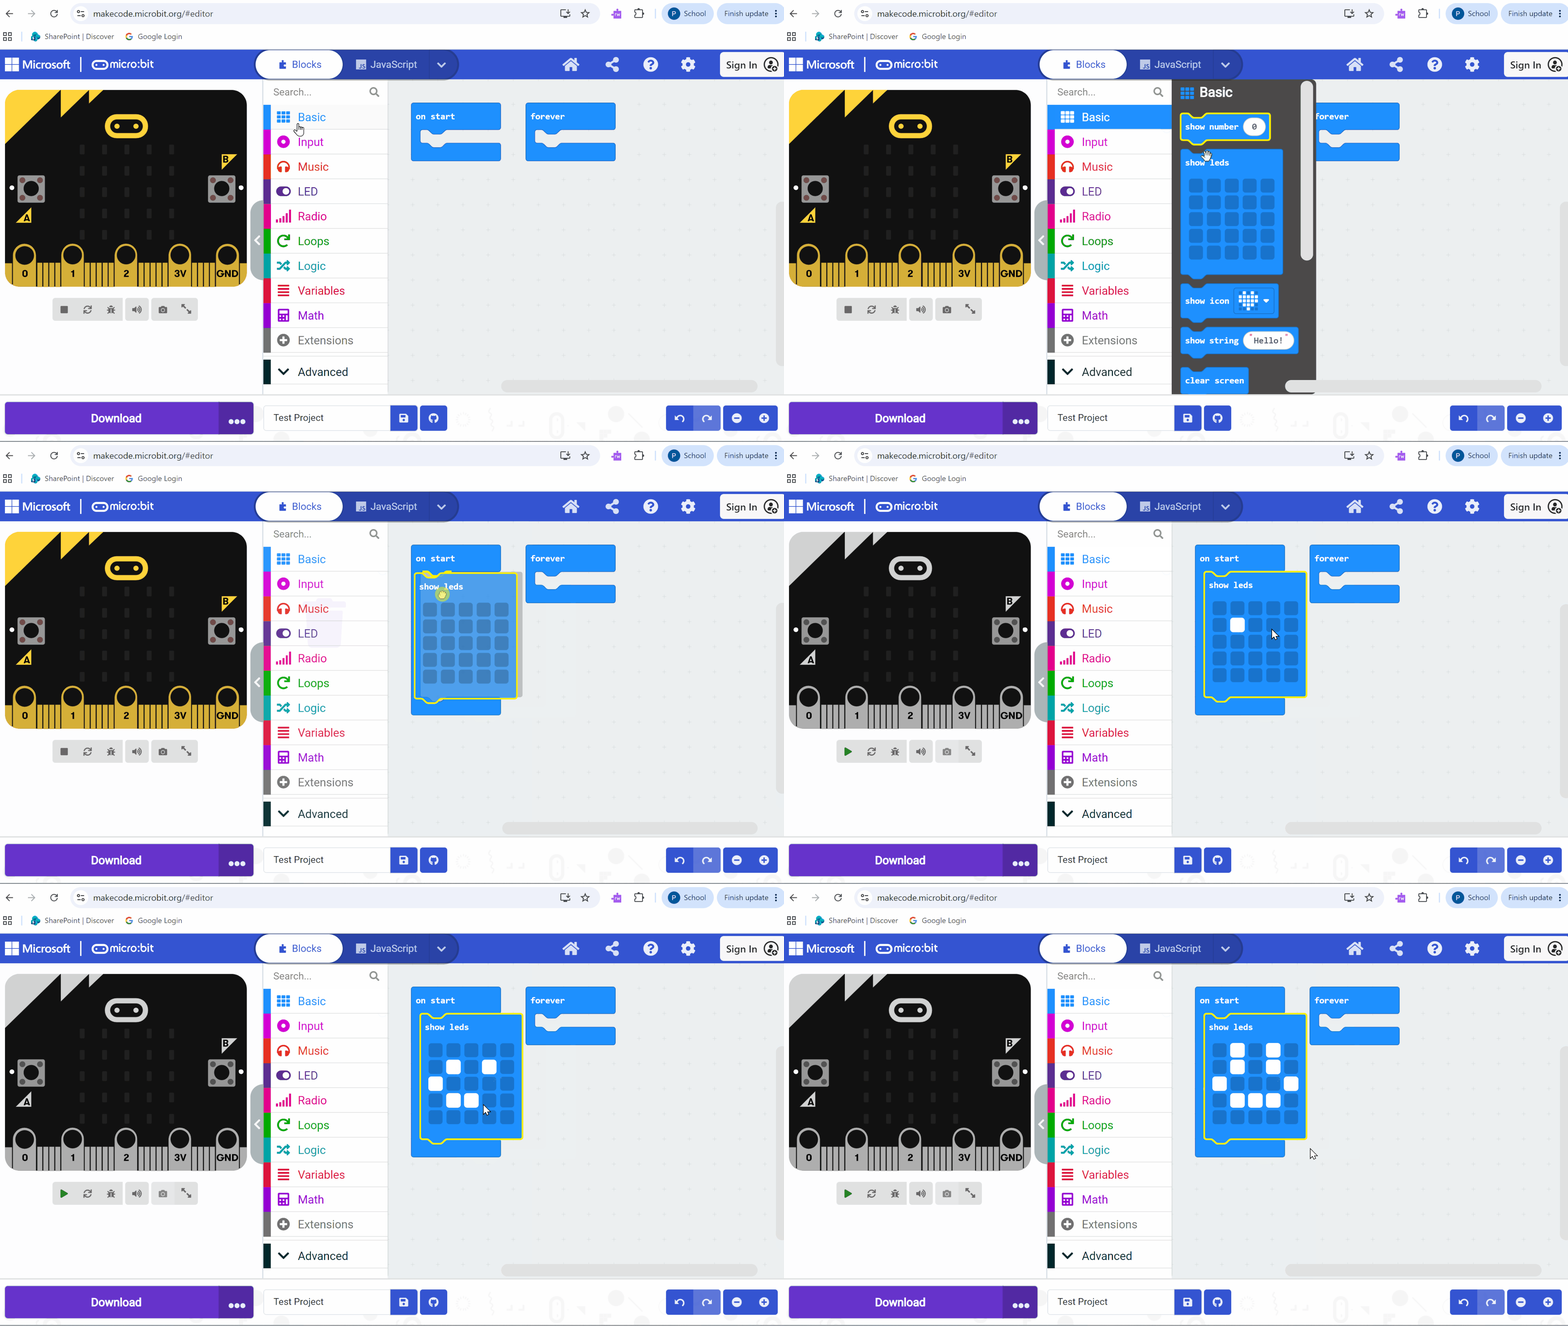
Access the coding blocks to find the basic blocks
Drag show LEDs to the right, and drop it into the block that says on start
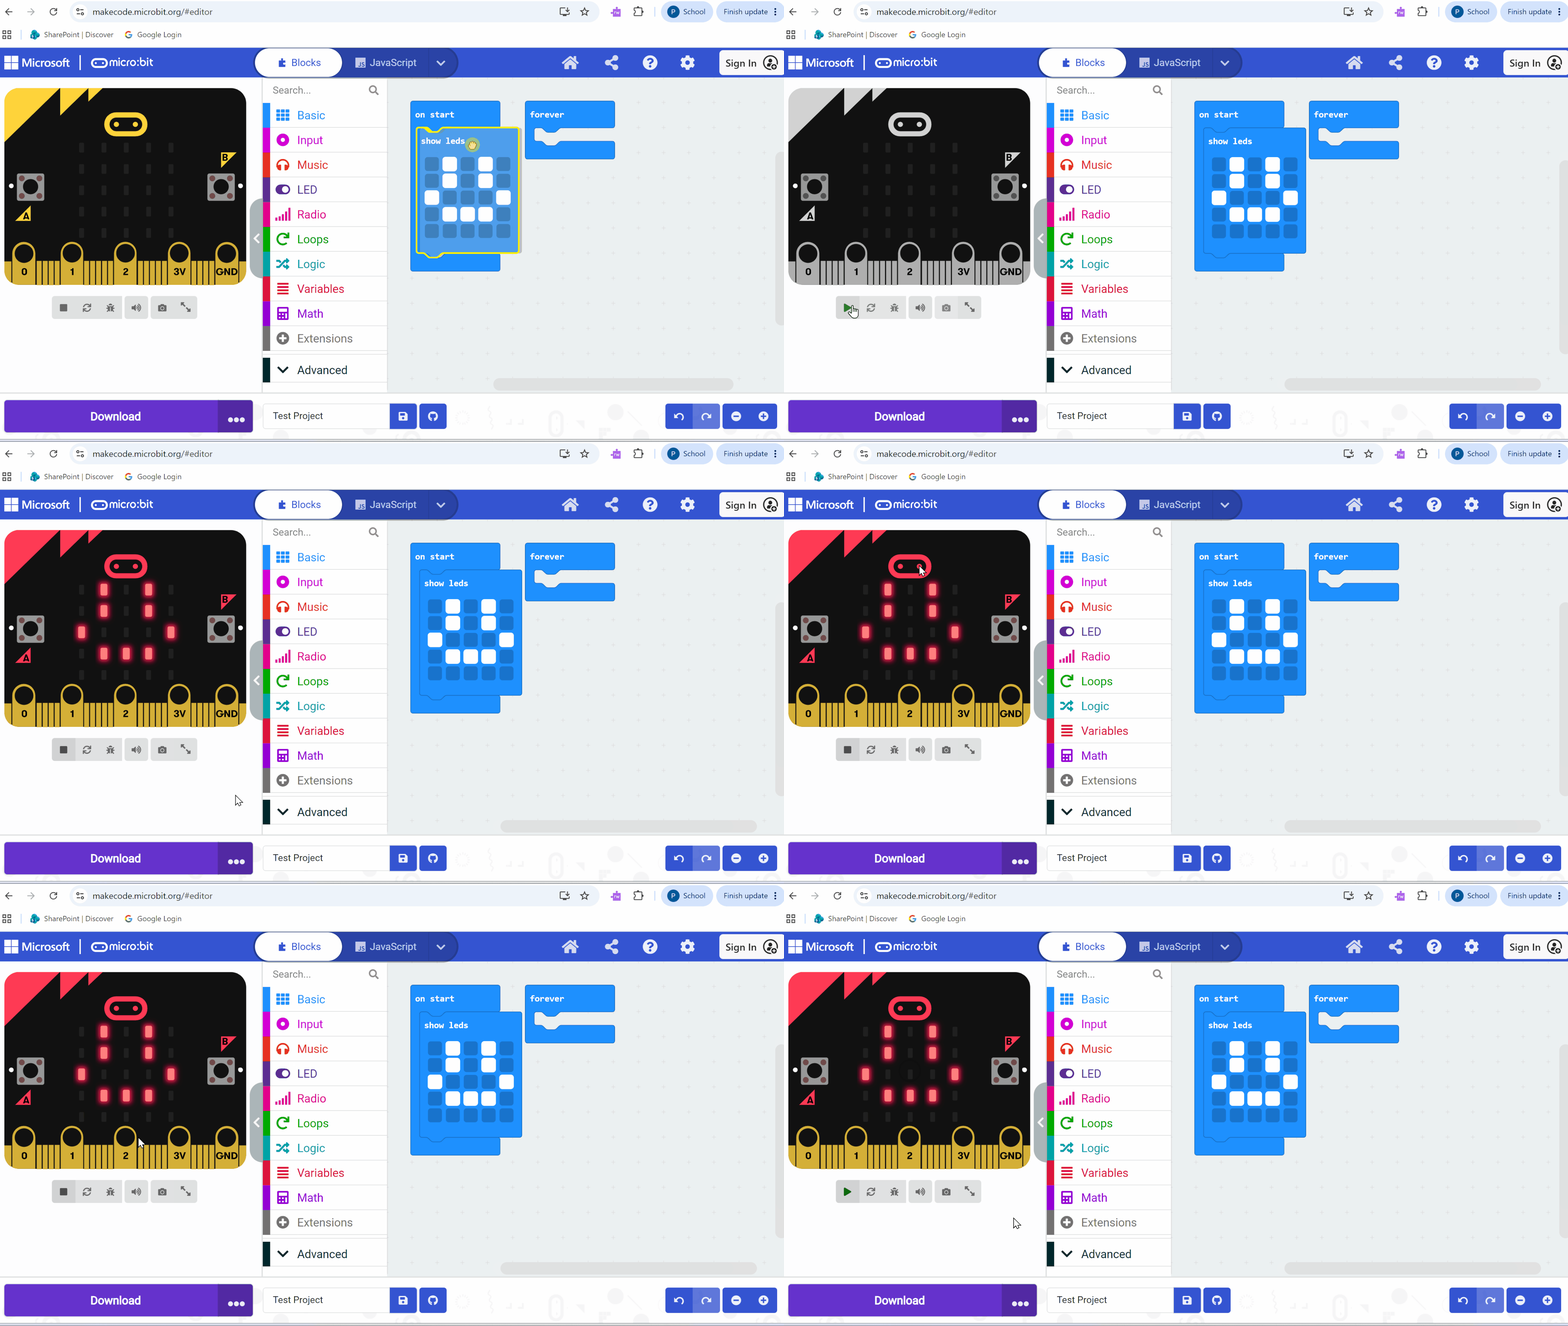
Press the triangle play button on the Virtual Microbit
The Virtual Microbit will begin to display the corresponding leds
Yay! You did it!
MicroBits
Time for some…

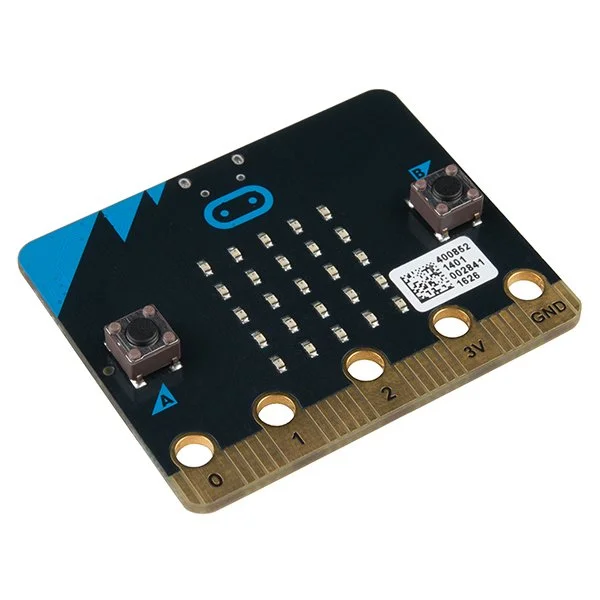
Time to connect your MakeCode project to your physical MicroBit!
Your MicroBit is a small computer that plugs in via USB
The MicroBit contains LEDS and two buttons (A and B)
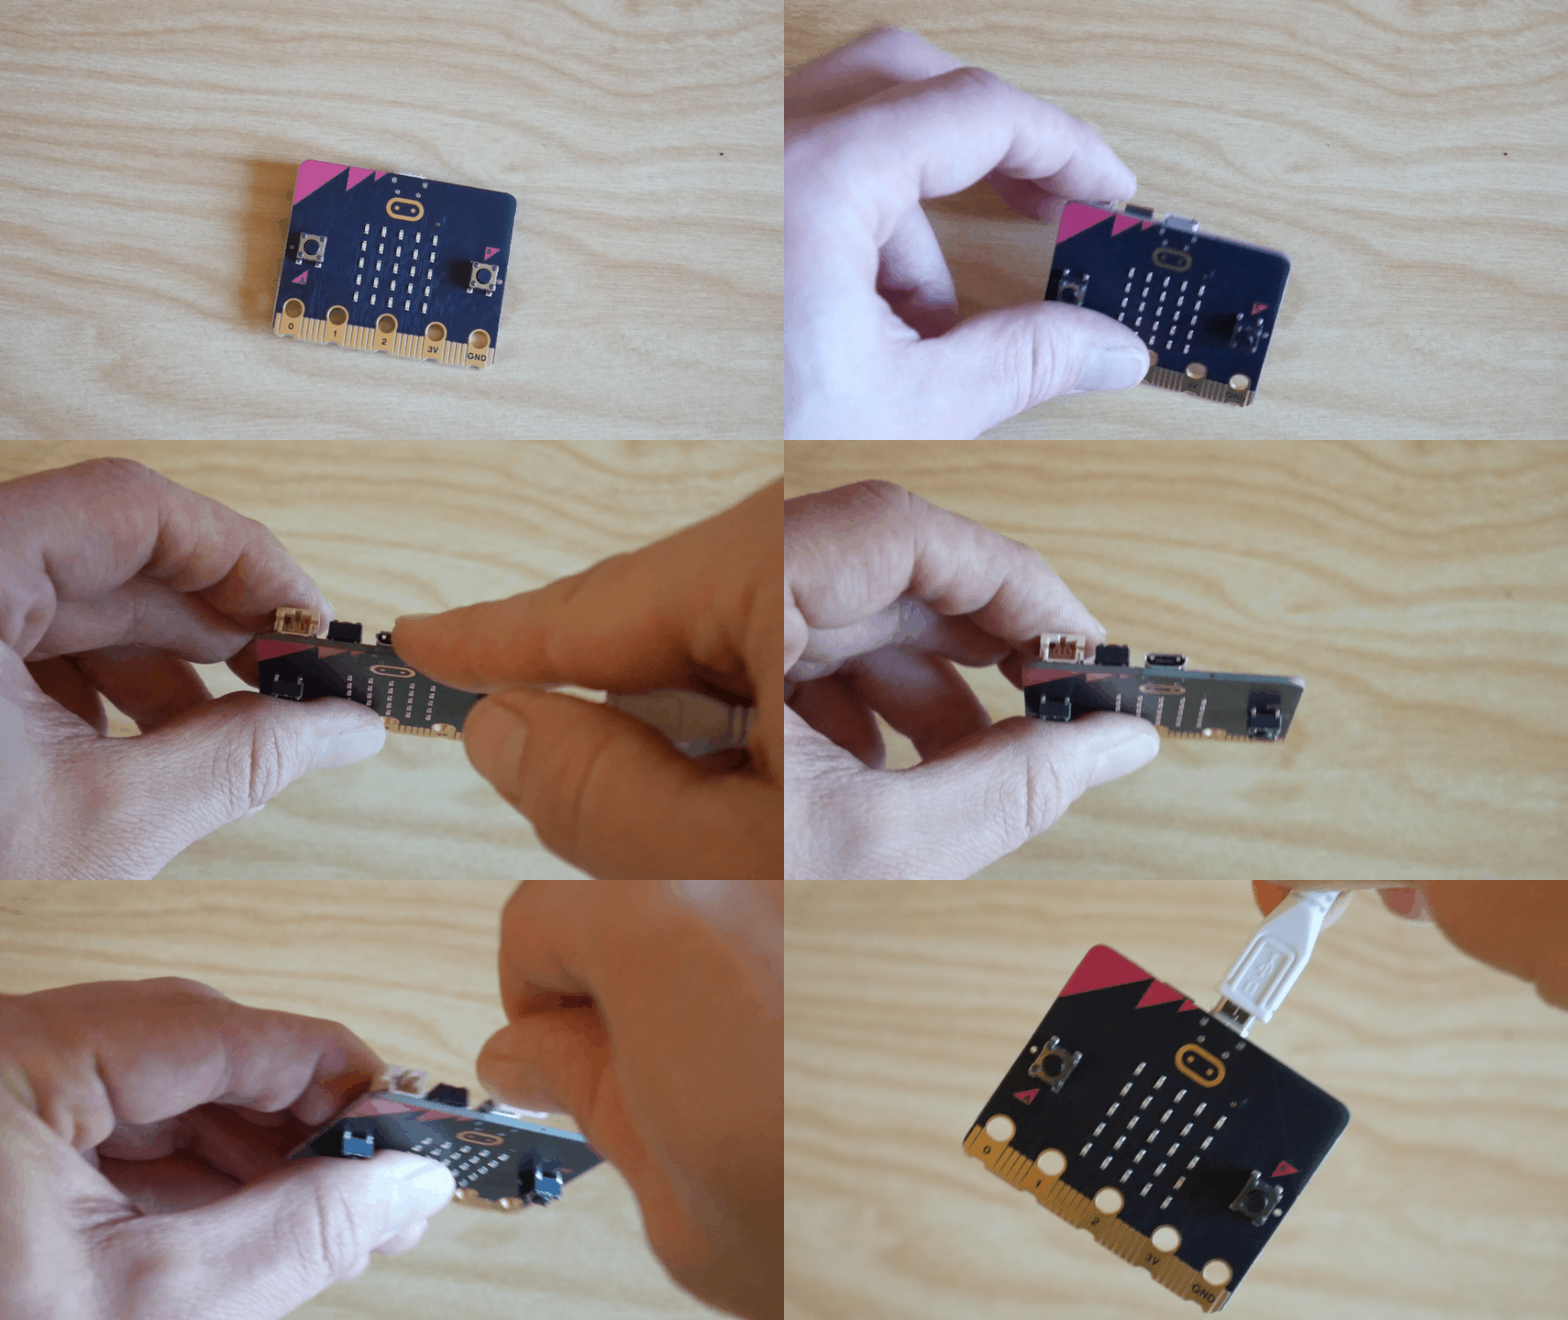
Time to connect your MakeCode project to your physical MicroBit!
Your MicroBit is a small computer that plugs in via USB
The MicroBit contains LEDS and two buttons (A and B)
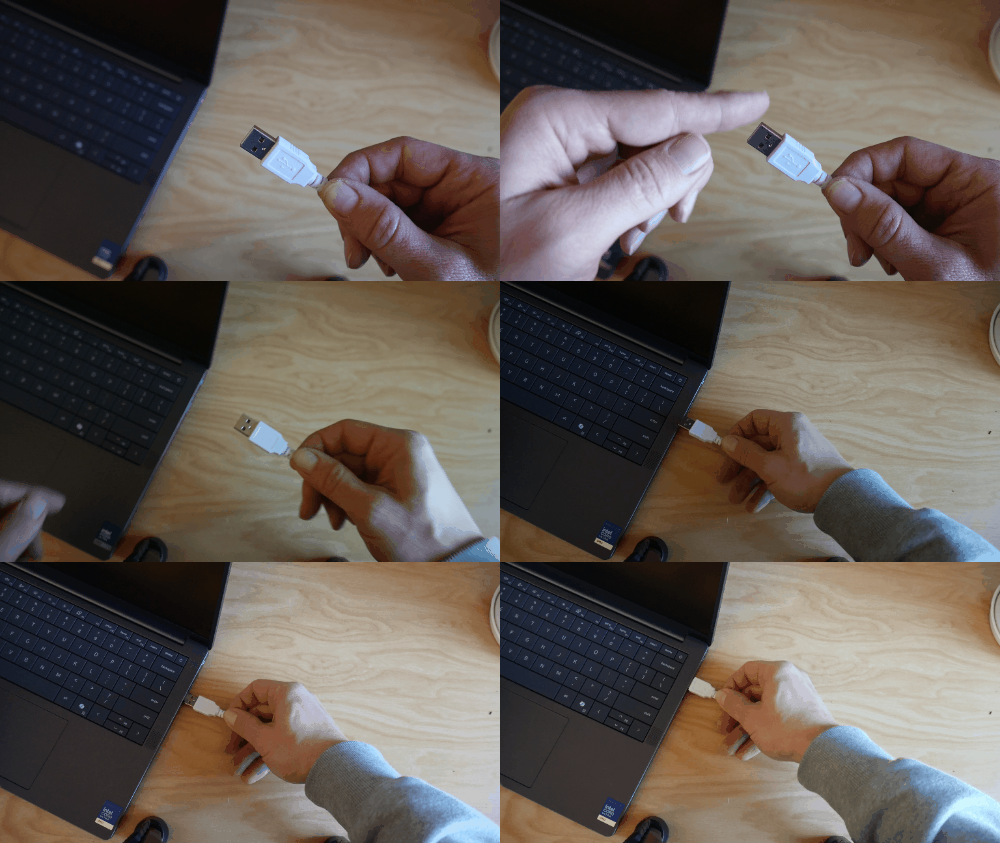
Plug the small end of the USB into the MicroBit
Plug the large end of the USB into the computer
Tip: be gentle when plugging in electronics, ask a teacher if you need help!
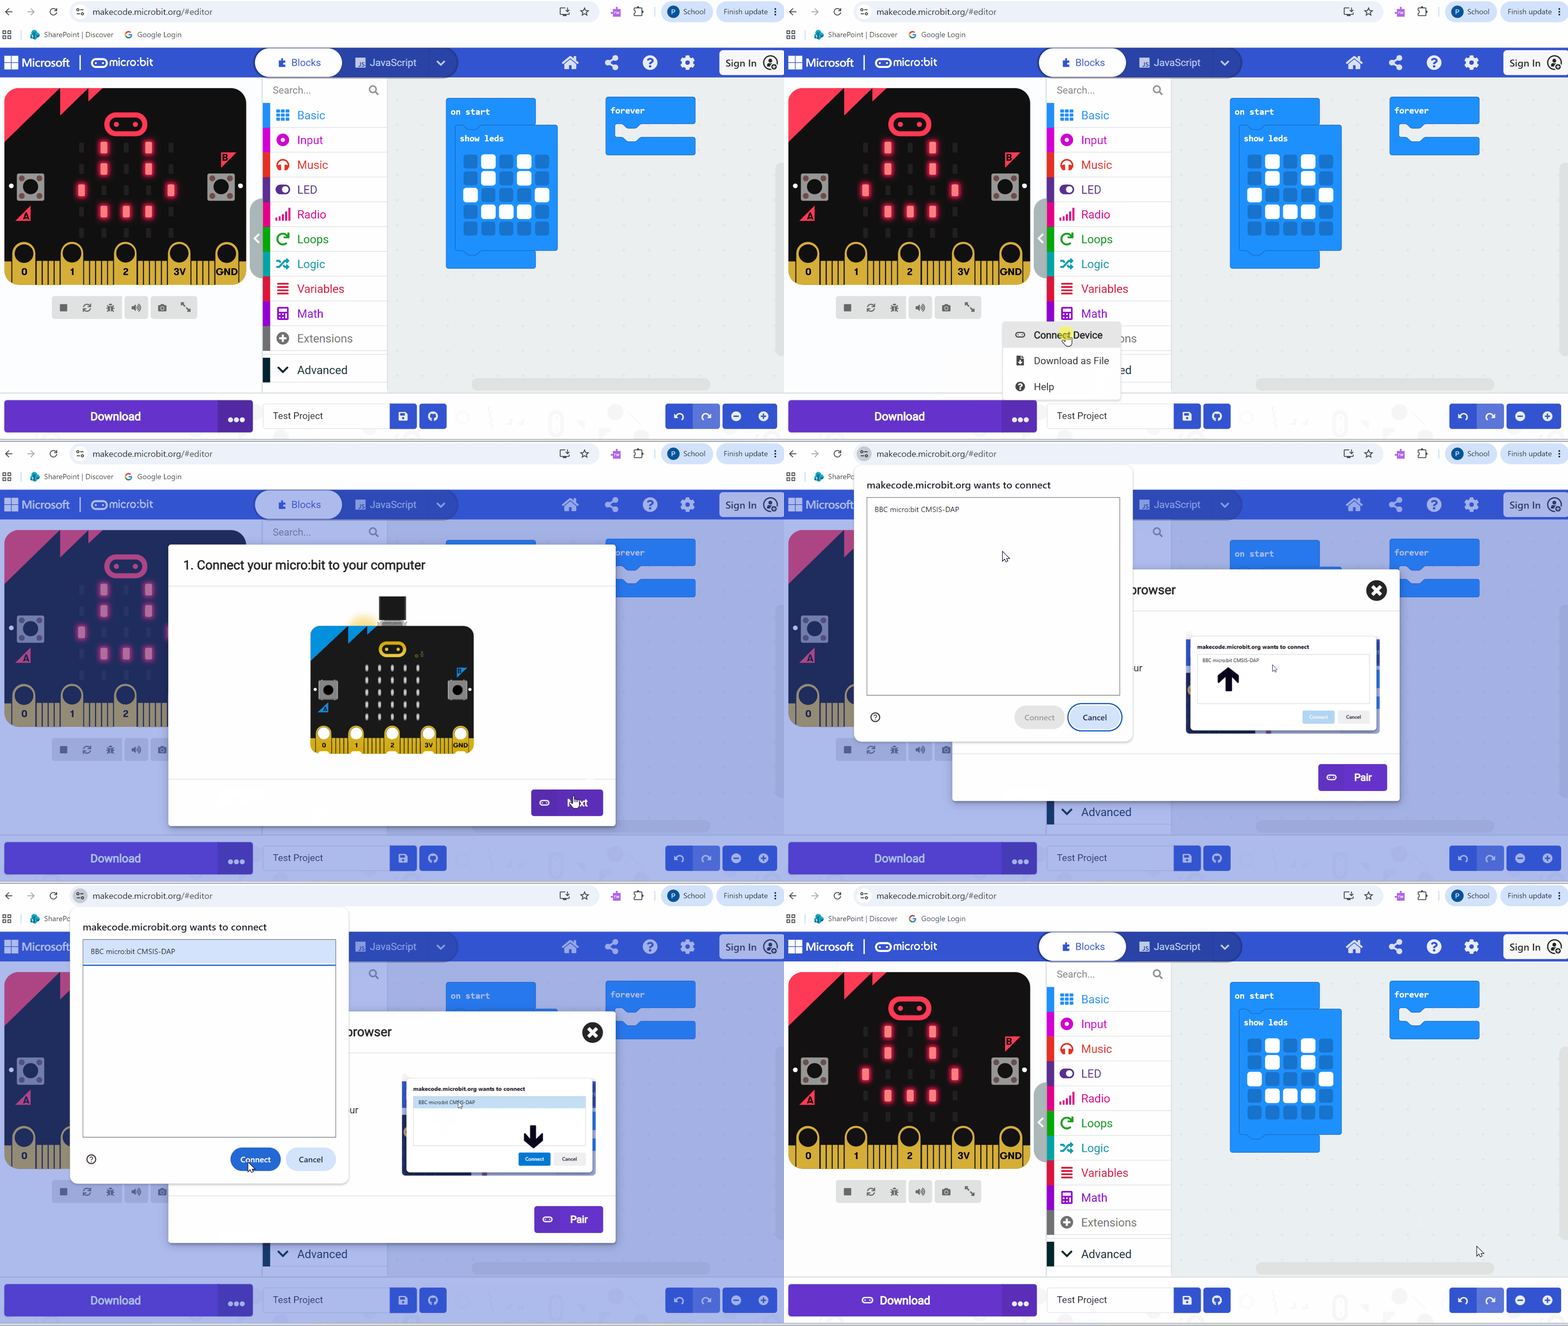
Pair the MicroBit by pressing the three dots next to the download button
Press connect device
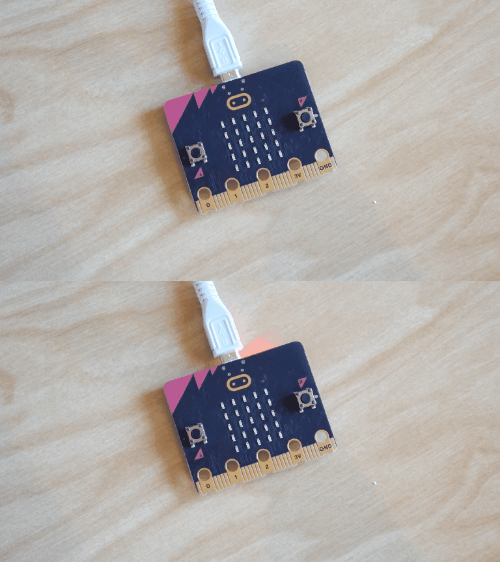
The MicroBit will the turn an orange light on its backside. It may flicker, and that’s okay.
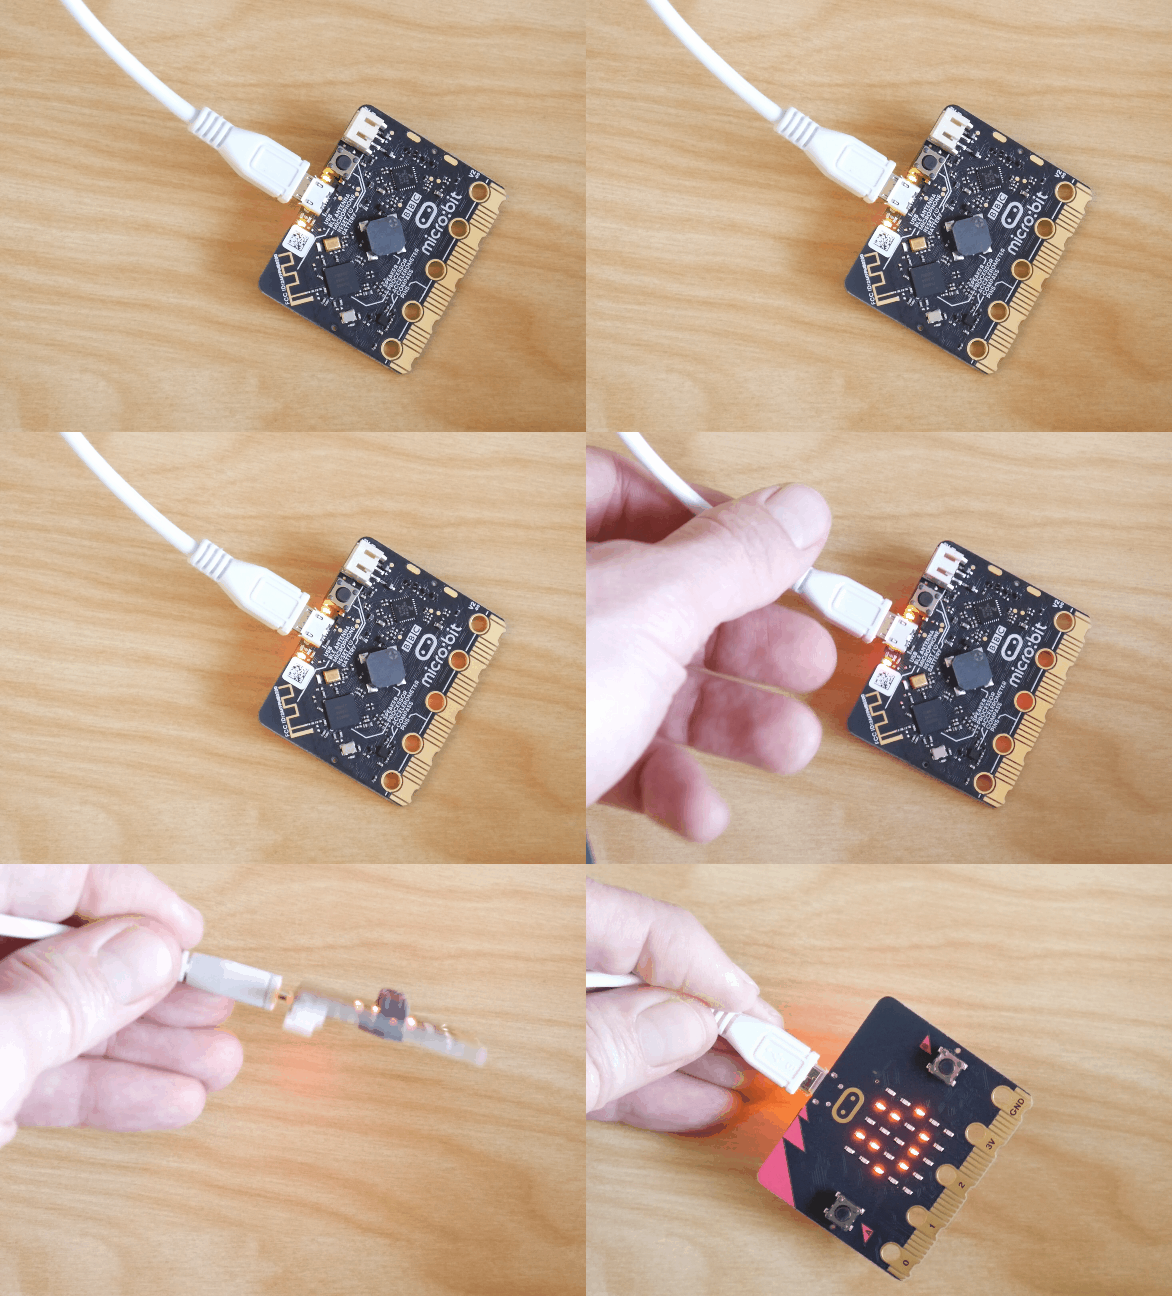
Press download to transfer the program to the MicroBit
The orange light on the back of the MicroBit will flicker until the program has been fully downloaded
The program should automatically play
Congratulations! You are now a computer programmer! Wow!